I find this portion very exciting because I’m looking forward to visiting some reindeer or maybe listening to some live Christmas music with my family. I feel like we don’t do this part of Christmas often enough – because we are always rushing around shopping and don’t plan for it particularly well.
Building this planner has given me hope that this might be our BEST Christmas ever!
If you have any ideas or ways to improve these worksheets – please email me at marj.sanpietro@gmail.com.
I had a great Christmas this year! But…like always, we left many things till the absolute last minute! I had a terrible migraine Christmas Eve so Dave was left with a lot of last minute magic to make happen. We weren’t even finished with the wrapping…*head desk*
Here comes the awesome plan!
A customized Christmas planner/to-do list ready in time to use for next year! Be on the lookout for a .pdf to purchase in June! Along the way – I’ll be sharing tips and tricks to kick start your holiday and keep in high gear!
This planner will be for a kid-friendly, family oriented Christmas with light entertaining. We aren’t cooking for 50 people. God bless you if you do that.
I’ll be using the planner and creating a Facebook group for everyone to share about their experiences too!
Some of the topics it will cover:
-cleaning and meal planning
-grocery shopping
– cooking and baking
-favorite recipes
-holiday cards
-letters to and from Santa
– gift shopping and wrapping
-family activities, gatherings and crafting
– decorating
-fresh vs. fake tree
– advent calendars/elf on the shelf
If you are anything like me – you have a million plans but you get overwhelmed.
My first step is going to be making priorities. What about Christmas matters most to me? Those are the things I am going to focus on next year.
It’s Tuesday morning and we are sitting at the dining room table where we do 90% of schoolwork. The boys have copy books I make them to practice their handwriting and vocabulary/spelling books. They HAVE them but they are not writing in them. They are discussing/playing with a fidget cube. Daniel actually redirects and starts – Aaron is cheerfully non-compliant. Less cheerful when I get involved.
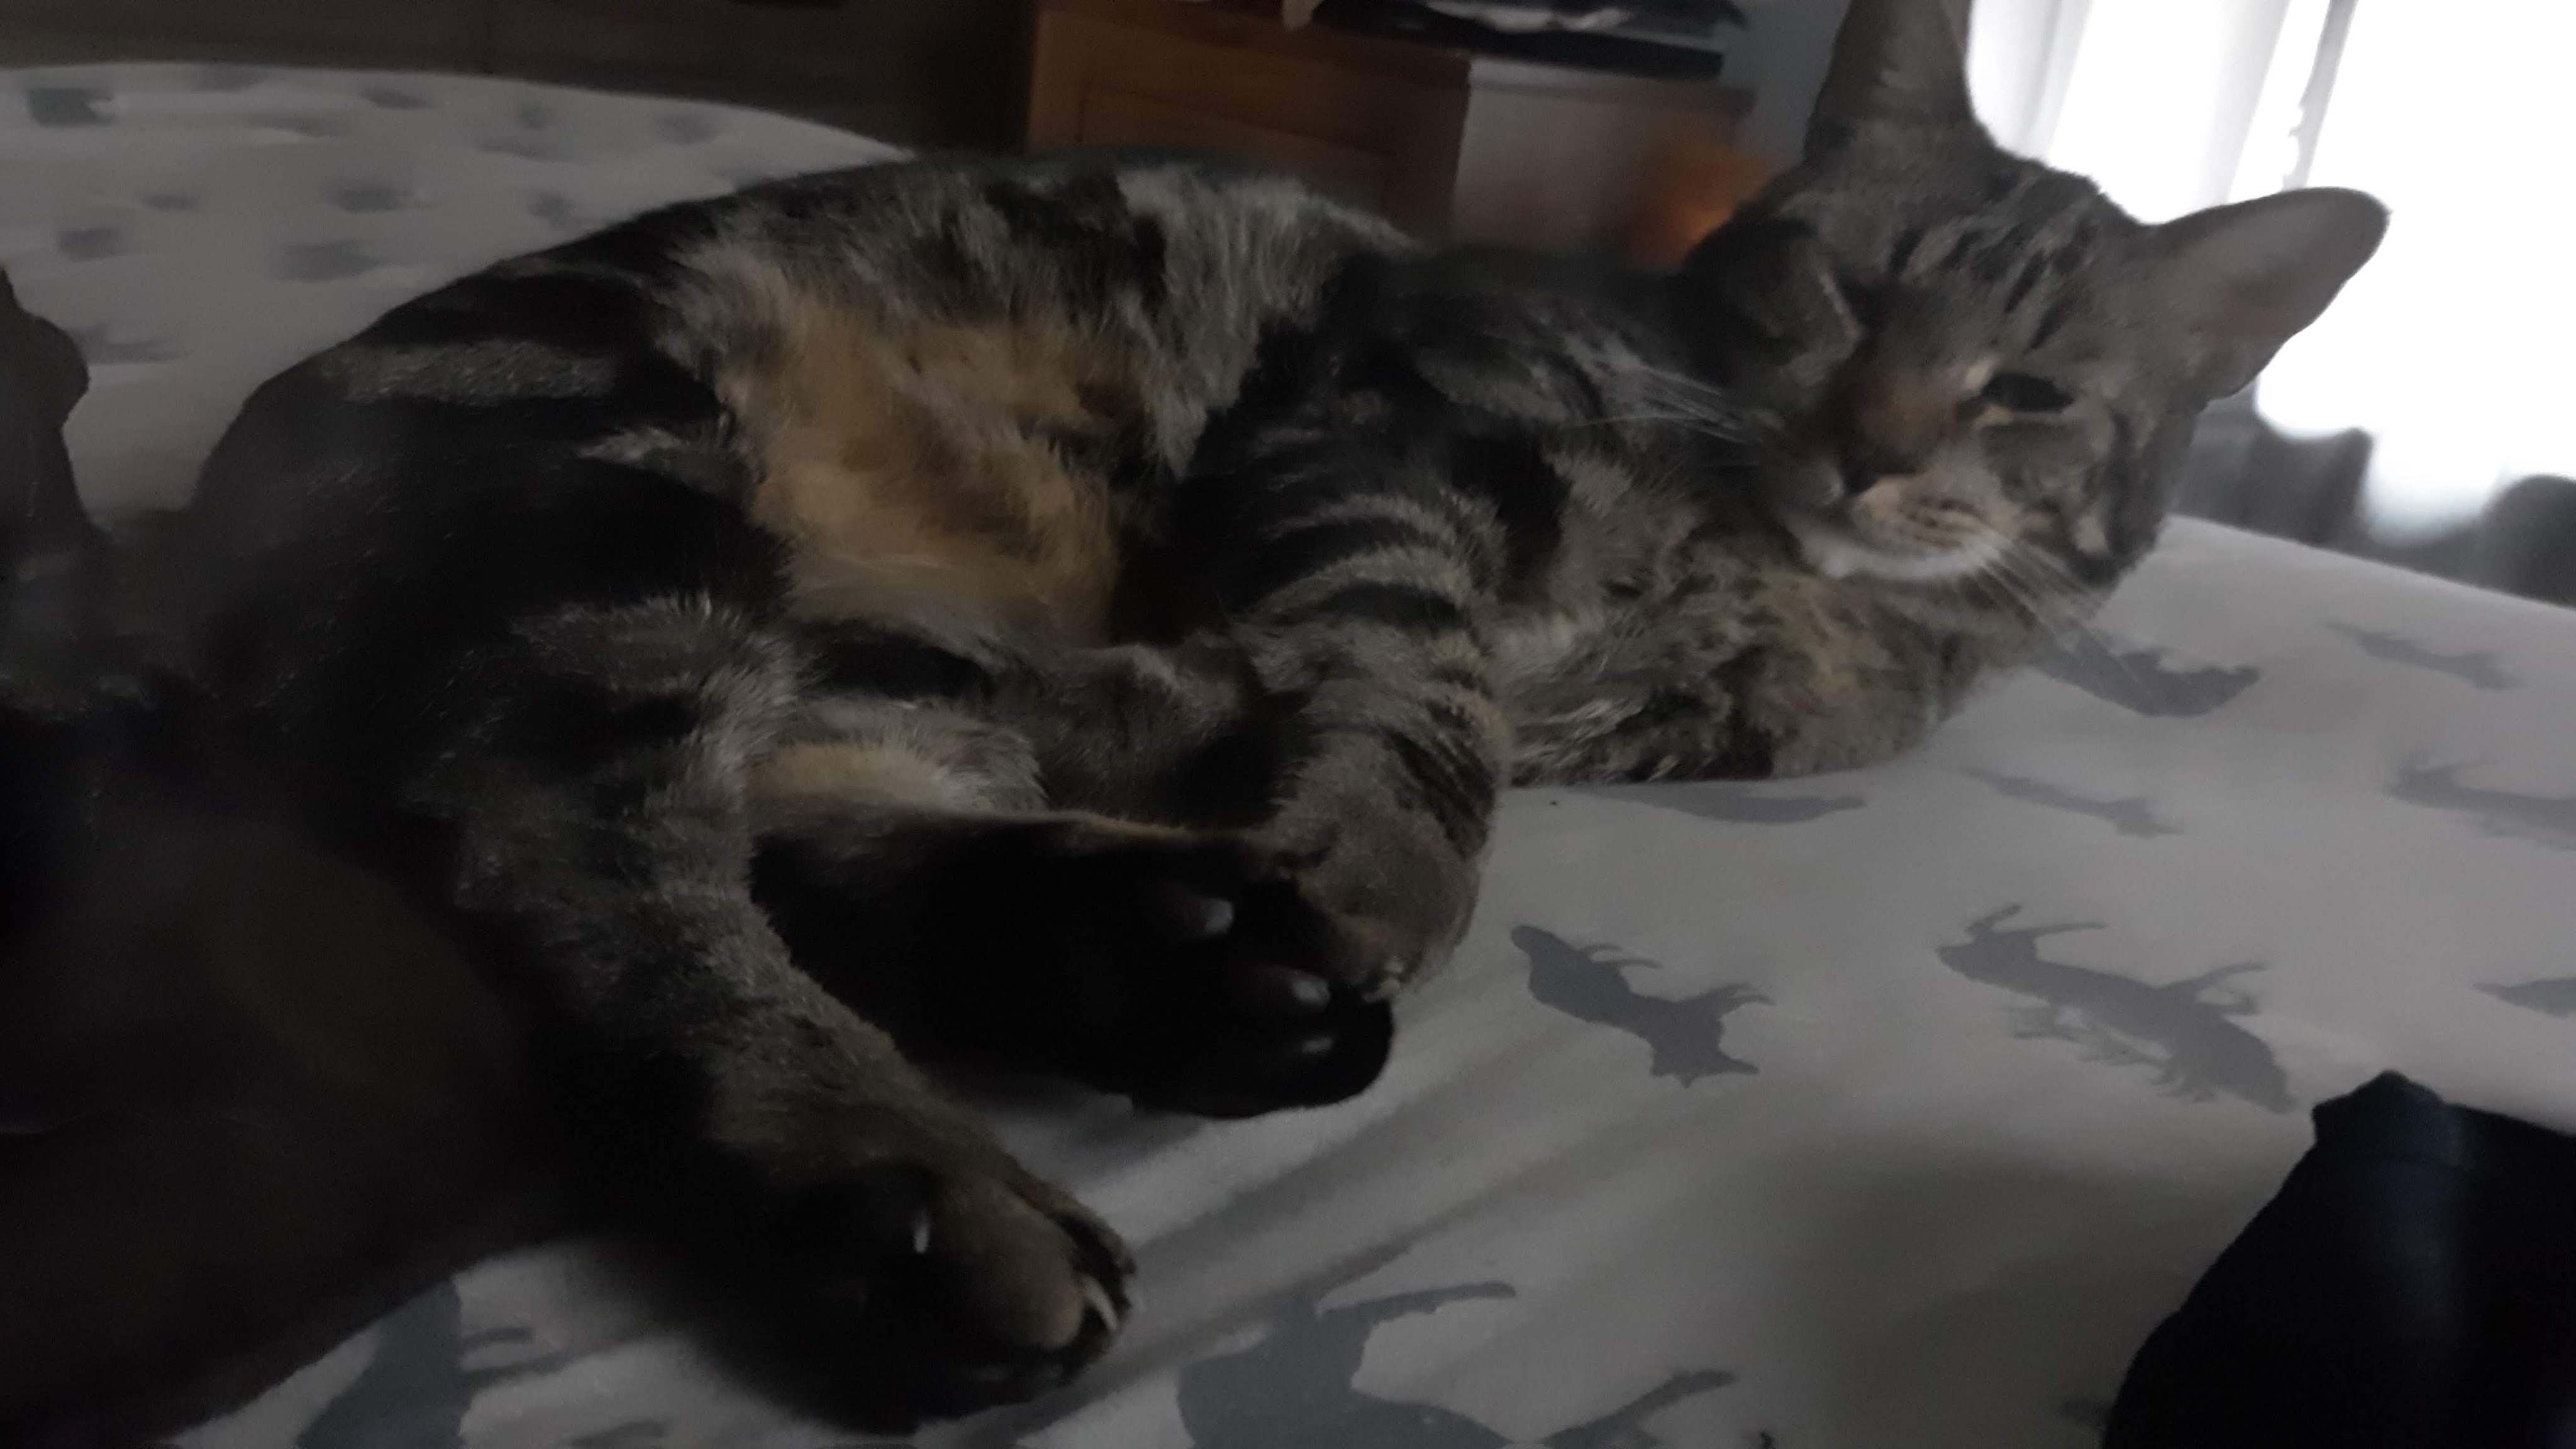
The cat is scratching up my new chair for the umpteenth time. I have a super-sized Little Mermaid mug filled with hazelnut coffee and pumpkin spice creamer.
The chair destroying perpetrator. He’s lucky he is such a pretty cat.
Today is still better than yesterday. I was struggling with my insomnia and couldn’t get myself moving until 2:00pm. Guess that was a sick day, folks.
After our writing and vocabulary practice – we are going over a growth mindset series from Khan Academy. That’s been a win – the kids have been asking about it – and I’ve heard them reference it in conversations with me and between themselves.
Daniel will probably work on his Native American project first – we’ve beaten this subject like a rug – and I had such high hopes for it. Aaron is going to work on fractions. He soaks up new math work like a sponge. We learn a new concept very fast and then we go and review old ones.
And we’re still working on writing, while discussing how no one slept while last night.
More screwing around…
I overestimate my patience. God bless teachers everywhere.
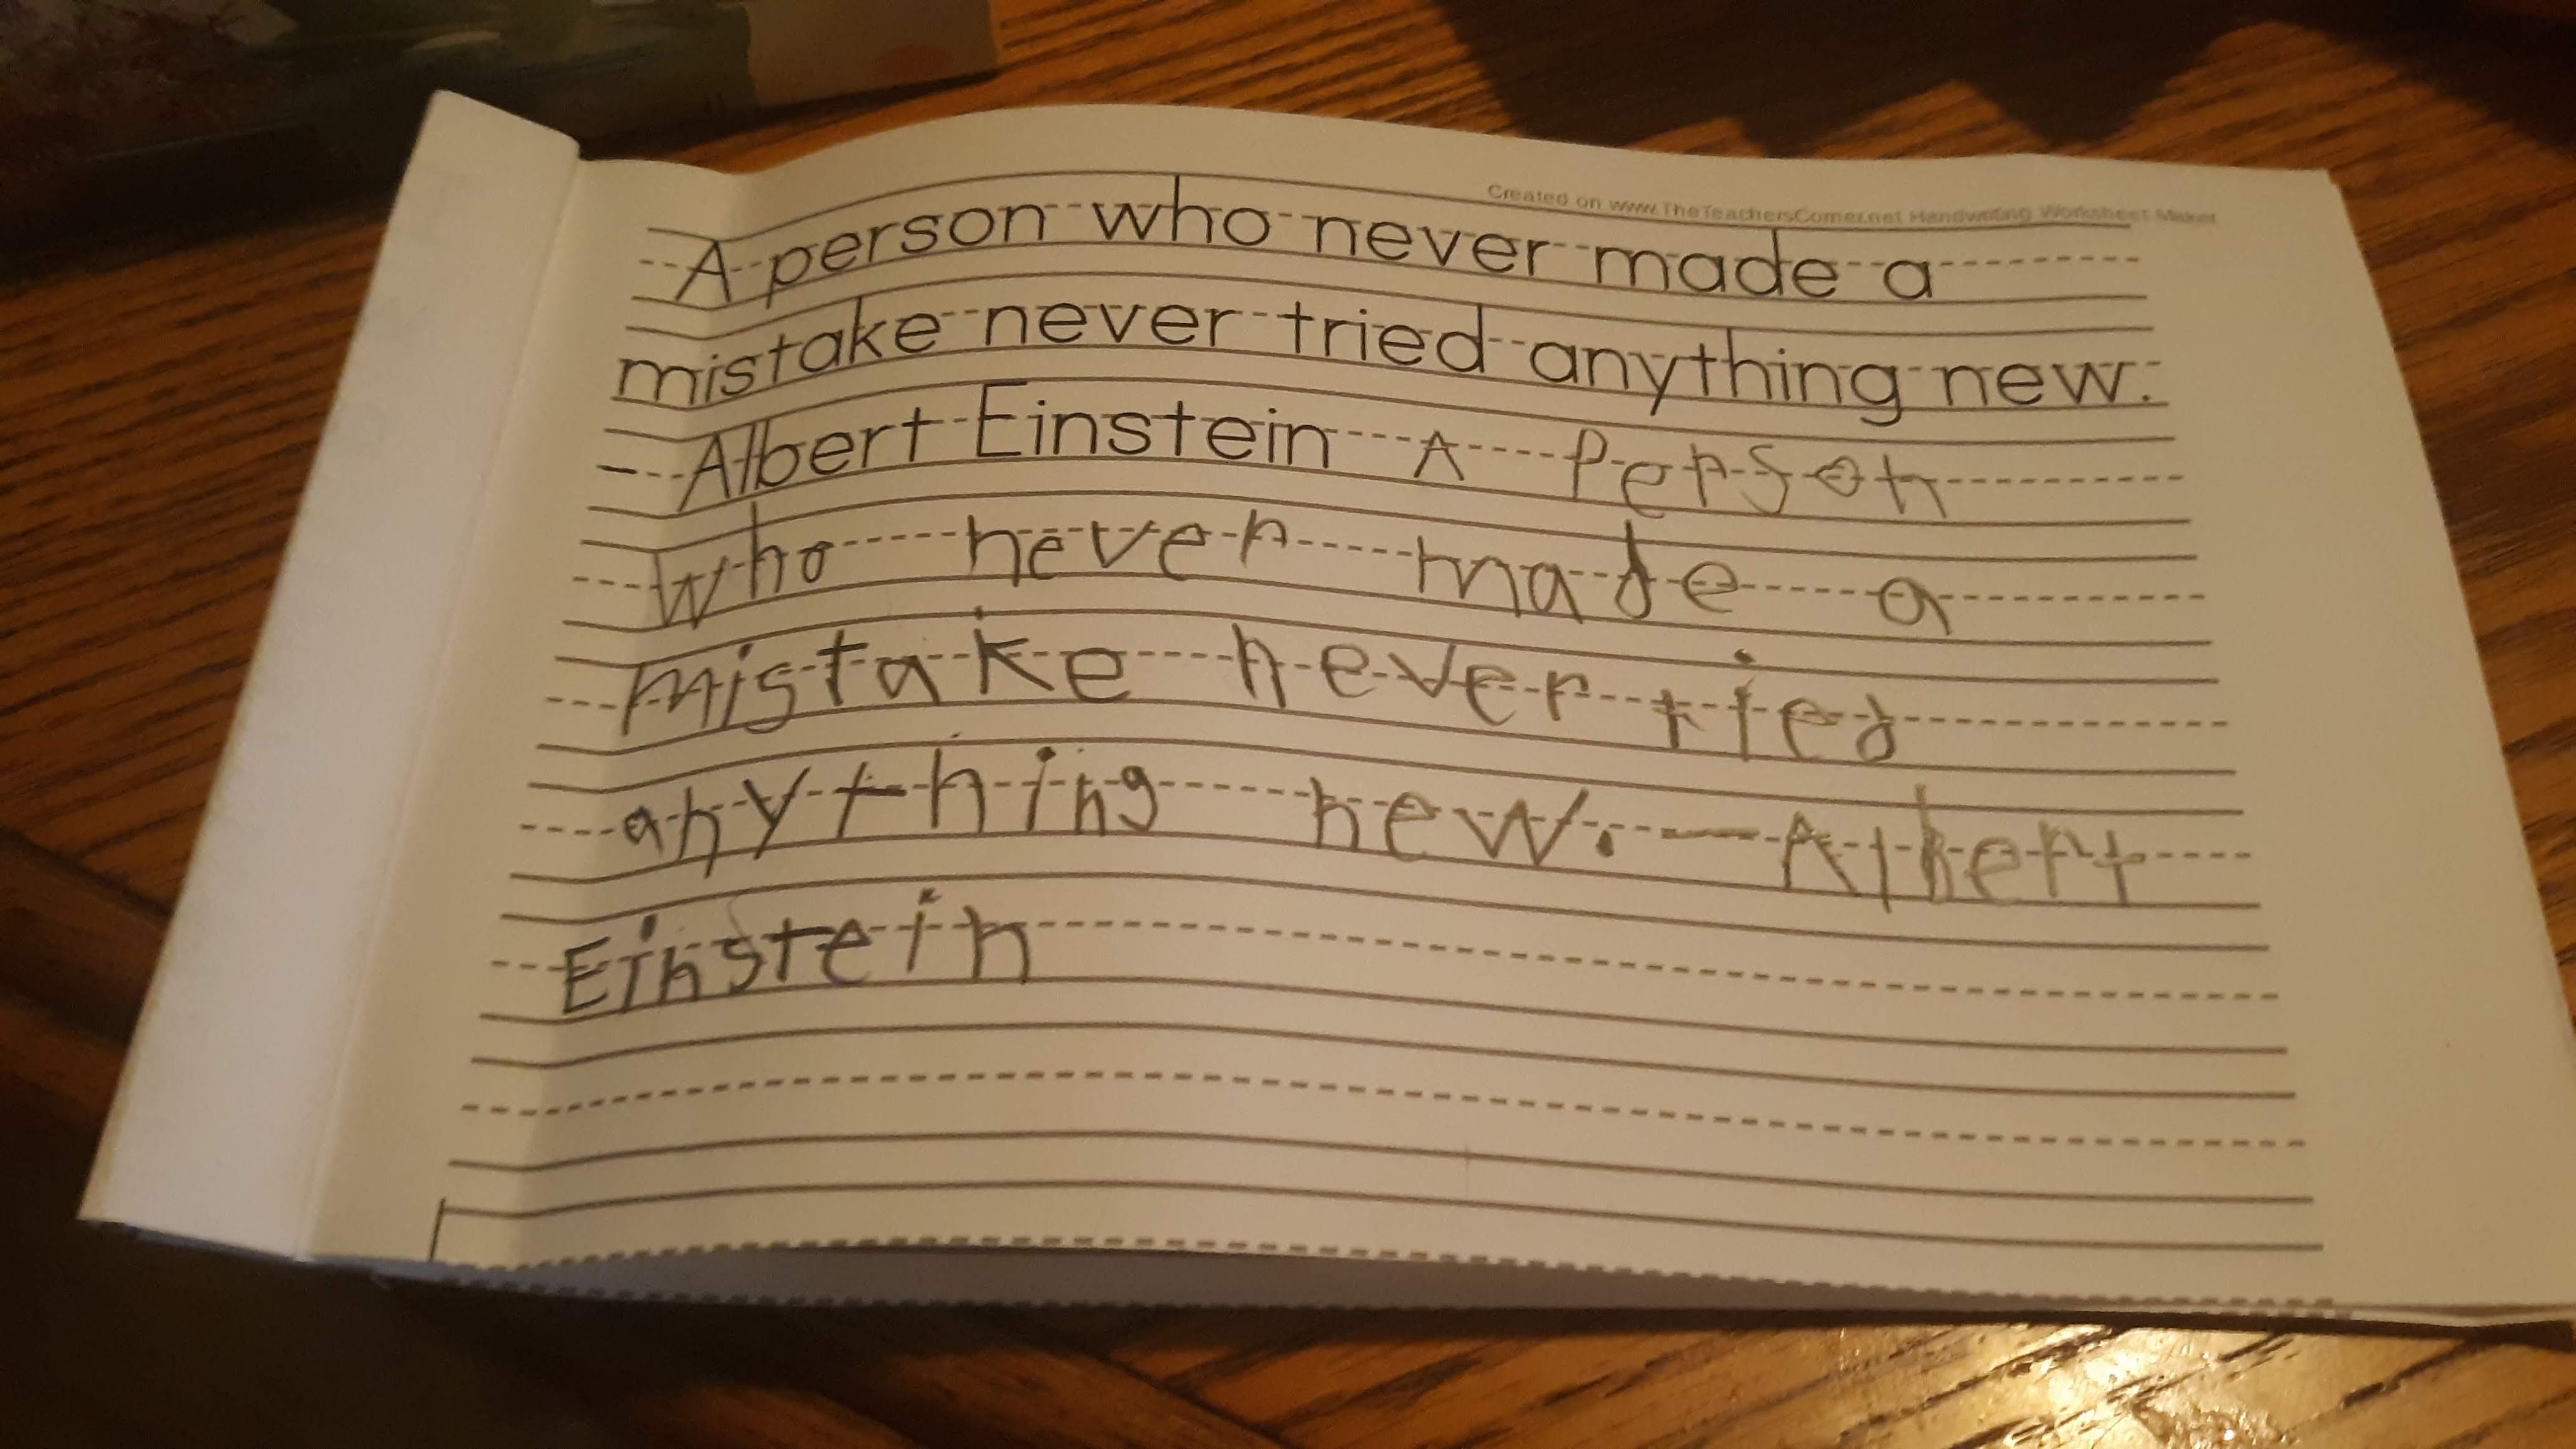
Aaron is chanting “Albert Einstein” and has taken 25 minutes to write 3 lines of text. The dogs are wrestling like lunatics in the living room but at least they aren’t snacking on cat litter or chewing my boots. Small blessings, y’all.
Aaron’s copy book – I make these semi-weekly with quotations, sayings and jokes. The kids at least sort of enjoy it – if they like what they are copying.
Daniel is re-writing Christmas songs and loudly singing his creations. Aaron just needs to write “Einstein” and WE CAN MOVE ON. So as slowly as possible with letter by letter updates is the way he’s choosing to go.
Then he threatens to erase it – and my first lovely swear comes out.
Is this a scene you are familiar with?
Later, Aaron and I spent an hour on building a Lego ice castle. He just wasn’t in the head space for sit-down and write work. We got through it – a battle at a time – but I always have the nagging feeling that we could have a better day.
Daniel worked resolutely – but he takes his time – he gets very distracted. I was pleasantly surprised and a little gratified when he self re-directed. I didn’t have to say a word! I’m still working to help them be more independent learners. Today, Aaron actually used a word book to look up spelling while writing in his journal. Small wins.
I didn’t know why I started chronicling our morning but I like how it ended up. I guess the point of this is that each day is made of good, great, not so great and just plain bad moments but the bad moments are worth the good ones.
Tuesday started like a hurricane – ended a little stormy – but there were some really great moments that I don’t want to forget.
It’s not pretty. In all honesty, I have about 3 days mapped out so far. I want to see how we do and what is working for us.
My homeschool space doubles as our dining room. We have two bookshelves dedicated to homeschool materials. I recently put up a small whiteboard and bulletin board set. I’m using these to keep info that we need every day. I’ll probably write the date on the whiteboard to help us all keep track.
Each of the kids have their own binder where I am keeping supplemental material and where I hope they can store their work. I also have a binder – it’s pretty rudimentary right now. I have a copy of each IHIP and a calendar for keeping attendance. I also have a place for my daily plans. I have been scratching them out on looseleaf paper organized by subject for each child.
I plan on using the internet extensively for material to fuel hands on learning. I’m really excited about science experiments, demonstrations, and projects. I have a ton of recycables and basic art supplies on hand.
I reviewed their IHIPs and started looking at the resources I’ve accumulated. I have started what feels like a small library – not that we didn’t already have one – but I purchased some workbooks and went through the books we already owned looking for non-fiction I could use for different subjects. I found out that we have a crap-ton of dinosaur books.
I felt that we needed an easy start so I used their Brain Quest workbooks to jump start our first few days. I like these because they help me to see what I need to cover in each grade level. I’m using these as a guide and a starting point for topics. We are going to be covering each topic in more depth and according to my child’s individual needs. For instance, my second grader is a developing reader. We are going to use the first BQ worksheet on digraphs as a starting point and continue practicing them throughout the week. I am going to accomplish this with worksheets I found on Pinterest. We’re also doing that with math. We are going to be working towards better understanding of the hundredths place value so we’ll study that for about a week.
I am going to cover some topics with both my 6th grader and 2nd grader. We’ll be doing a coordinated study of U.S. History dating from immigration across the Bering land bridge to… however far we get. We will also be doing Art, P.E. and music together. Music isn’t even a required subject but I think it would be terrible to miss so I’m on the hunt for some materials. In lieu of having a solid plan for Music, we’re going to start with classical composers.
I am excited and nervous about that first day. I’m not planning on jumping into lessons right away. I am going to use the first day to get them excited. We’re going to name our homeschool, talk about how we learn best, make lots of slime and maybe go on a walk. I want to find out what they want to learn about and do so I can incorporate that.
We bought an amazing shelf for $15 and turned it into “Catopia” for our three kitties. We bought 8 pieces of scratchboard, 3 pieces of carpet remnants, 7 dust mop heads, a brush head for a broom, and a mop head from the Dollar Tree. I used E6000 glue for this project and I went through 1 large tube at $3. In total – $38 for an amazing sturdy piece of cat furniture.
Tools:
Protractor
Jigsaw
Staple gun
Rotary tool
Serrated knife
I started by gluing the scratchboard pieces with E6000 to the long side of the shelf. I reccomend doing this a piece at a time, letting it dry several minutes between each piece (if you make a Catopia someday). After it dried, I trimmed the extra off with a serrated knife.
Then I used the protractor to draw circles on the shelves – this part was easy! I used a Sharpie to darken the lines and then my husband and I used the dremel to make holes for the jigsaw to start in. He cut out the holes for me with the jigsaw. This was challenging because of the lack of space near the walls of the shelf.
Together we figured out where to put the other features. The glue was not holding the mophead, so I undid the yarn from that. We used a staple gun to attach it to the bottom of a shelf where it hangs down.
I used the staple gun to affix the carpet pieces. I love the paw prints in the front and the cute mini Hello mat at the bottom! My kitties literally had a welcome mat put out for them.
I sprayed it with catnip spray and baited it with treats. We are also putting them in it and petting them to let them know it’s ok to be in.
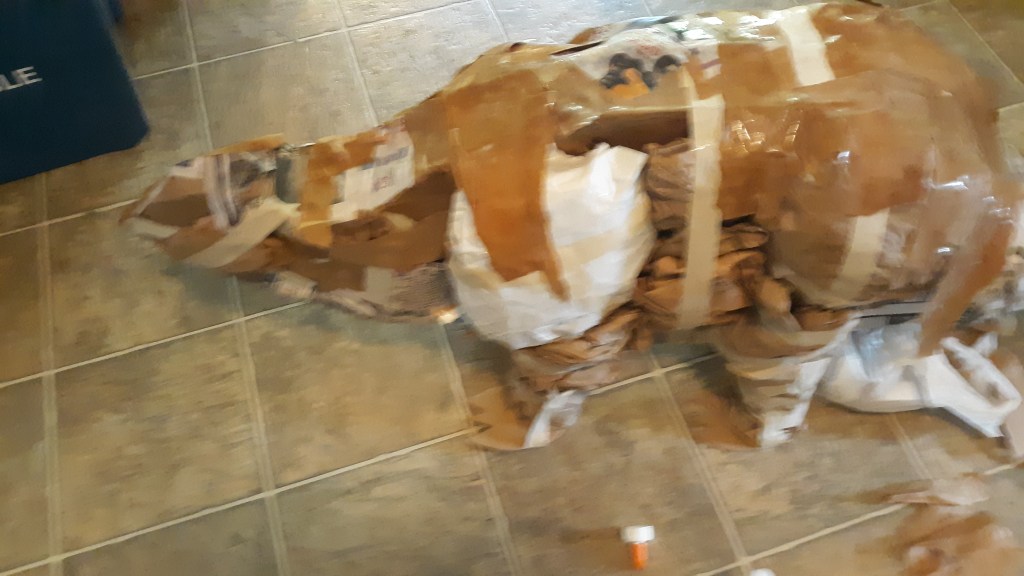
Progress goes slowly on the dinosaur. I’ve lost my helpers to Minecraft Dungeons…and the mastermind is not in love with the craft of paper mache. He does not love the glue on his hands.
Mr. Stegosaurus now has firmly attached feet. I ran strips lengthwise from the bottom of the feet up both sides of the leg and then wrapped additional strips around the leg.
I’m working on attaching the spines. I used what the boys drew and made more. I think I’ll need about 10 pairs of spines in varying sizes to finish. I used the handy-dandy masking tape from Scotch that doesn’t suck and went to town. One tip I can share – I attached the spines together where they met and hopefully gave them more stability.
I’ll reinforce them with more strips and glue and then add paper mache clay to give them detail. The next big task is making the paper mache clay. I’ll use the clay to smooth out my sculpture and add finer details – besides accenting the spines. I’m thinking toes, facial features, and bumps for knees are possibilities.
Three ingredients that I remember off the top of my head are joint compound, toilet paper and PVA glue (like white Elmer’s). I’m interested in how far the recipe from Ultimate Paper Mache that I plan on following will go in covering Mr. Stegosaurus. I think I’ll probably need multiple batches.
If I continue the dino paper mache saga – I’ll start cutting out the T-Rex. I feel like he is going to be more difficult – because he’ll be standing up on two back legs. Luckily, I found these cardboard boot inserts that I might use for his feet. They seem heavier and like they would give him more stability.
Stay tuned and comment below! What’s the craziest thing you have made for your kids?
My husband says it looks like a dinosaur right now…a zombie dinosaur 🤣.
Alright, Scotch brand masking tape for general purpose for the win!
I continued using larger pieces of paper scrunched and otherwise manipulated to add more body.
I focused on the sides and head when I added shape. I also wrapped the legs with more paper to bulk them up.
It would be pretty funny to have a dinosaur with teeny tiny legs.
If you are as crazy as me and want to attempt this –
1. Use large pieces of masking tape to attach all of your paper and do not go bargain masking tape shopping for this large of a project
2. Do not worry about perfection – think of it as impressionism or giving the general idea of something at this point. You are going to add more layers and can add detail later.
He is about a third of the way covered at this point with another coat of paper and glue.
It helps smooth out all of his “insides”. We added his feet with tape which the mastermind behind this madness drew and cut out.
The stegosaurus is almost the same size as my large dog…
The madness will continue…
The next step will be continuing to seal in his insides so he’ll be less zombie-like and we’ll be adding spikes and plates.
I’ve already asked the mastermind what color we’ll be painting him and he is considering grey.
Does anyone know if stegosauruses were grey?
Also, a triceratops has been added to the dino wish list. 🤦♀️
A serious question – what does one do with large paper mache dinosaurs when they are completed?
My 6 year old is a very creative kid and when he decided that we needed to make were some BIG dinosaurs – my brain went right to paper mache for this project because it’s inexpensive and these dinosaurs don’t need to weigh 100lbs each.
I was really impressed when I suggested it to him, because he knew exactly what I was talking about and related it to a display he had seen at school. He decided that he’d like us to make a stegosaurus first AND THEN if that worked out, we could try a T-rex.
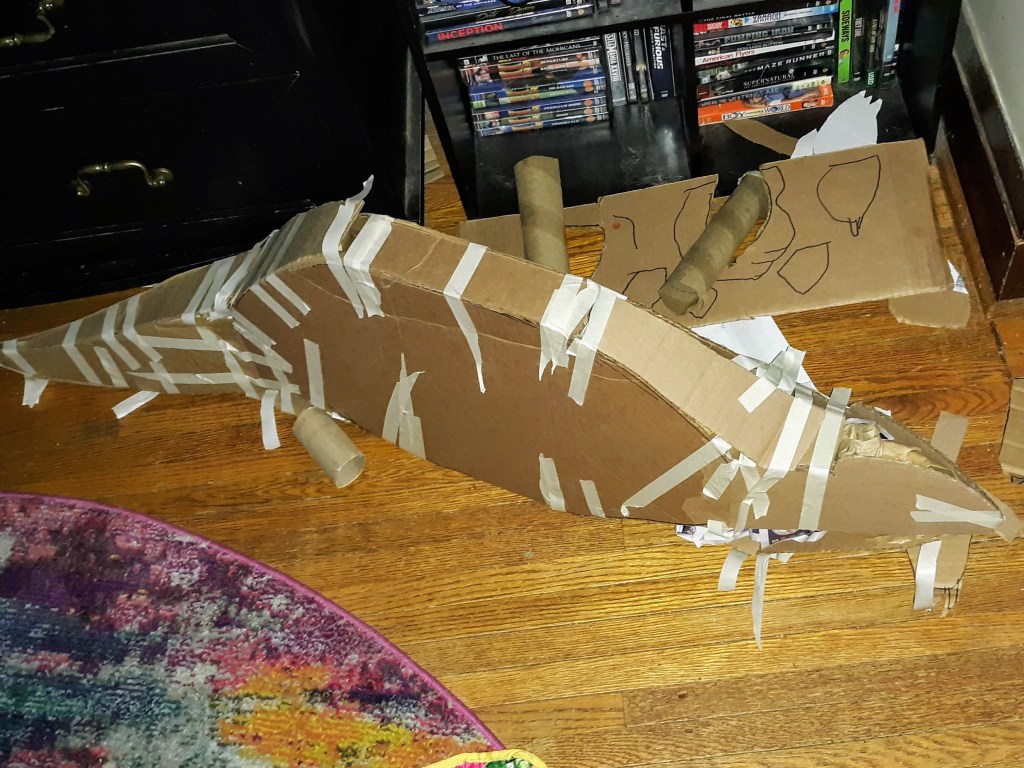
To begin with, I needed some reference material. We looked at a couple of his dinosaur books so I could get a general shape for this stegosaurus. I drew and cut the torso pieces out. I created the head and tail pieces separately so that I could try to position them a little different from the rest of the body – realism counts when you’re making dinosaurs, y’all.
The boys helped me out by tracing my first pieces onto other cardboard – you need at least two of everything to give it some volume because we’re going for 3D! They also helped by making some plates, spikes, and feet for the stegosaurus to be used later.
To continue building the shape, I connected the top of the stegosaurus more narrowly than at the bottom. I attached the main pieces by adding strips of cardboard of the correct width along the sides and held the whole thing together with masking tape, slightly angling the head and tail. Before I closed Mr. Stegosaurus completely up, I stuffed him with recycled newspaper to give him some mass for better stability.
Here’s Mr. Dinosaur in our living room – hanging out waiting to be permanently sealed up – you can see the tape starting to have some problems.
I’m not sure what was going on with the masking tape – maybe it was too cheap for the job? We put the stegosaurus aside for a few days but the situation became critical when it didn’t seem to be staying together anymore.
It was definitely time for some good old fashioned glue and paper. I typically use an approximate 50/50 mixture of water and PVA glue. We tore up scrap paper and pasted it on the frame of Mr. Stegosaurus – sealing up all the seams and making any last minute adjustments.
Next we started bulking up the body. I used paper towel rolls to begin forming the legs and then larger pieces of paper scrunched and otherwise manipulated to add more body.
At this point – we were using the same crappy masking tape and I got frustrated – so it’s been sitting for about a week now. I did go buy some better masking tape. We’ll see how it goes…to be continued.
Comment below if you’re excited to know how this project turns out!